Photo Cliff Notes
Art 264/265
CCC&TI
HESSELL RULES
1.) Look at the Light
Photography is light. Study it. Make it work for you. There are three aspects
of light you should understand. Know these!
Quality:
Hard Light/Soft Light.
Hard light
has sharp shadows, soft light has no shadows. Clouds, fog, haze, and forest fires diffuse the light which takes away
the shadows.
Look for the shadows! Know what type of light you are shooting in so you can make it work to your advantage.
HARD LIGHT?
Think texture. Look for subjects that have texture, and then try to have the light "rake" over that texture at a 90 degree
angle ... Nice. Think Clint Eastwood, old barns, peeling paint, rolling hills ... Whatever. You WANT the contrast between
the two. My favorite type of light!!
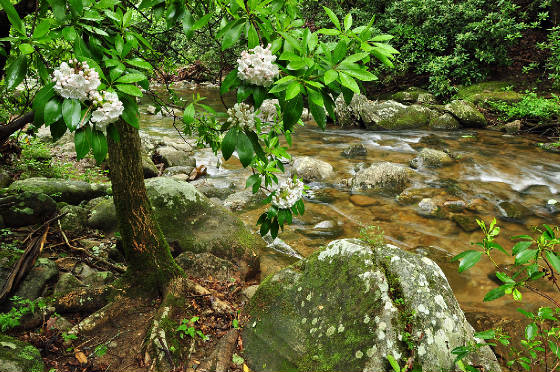
SOFT LIGHT? No shadows? Good, now use it. Women, flowers, kids, puppies, you can't go wrong! Soft
light brings out details ... Look for all the soft and fluffy things in your life. Easy.
Hard or soft, make the light work
for you. Period. If you have hard light, but want soft light, no problem, defuse it. That is why I gave you all a white trash
bag. Cut it open and hold it between the light and the subject … Have soft light, but need hard light? Cool. Light
it. That is why I told you to carry a flashlight, or buy a flash. Blast it! Add light when needed. Simple. A candle …
Your car headlights … A Full-Moon, any type of light you can find. Yes, even your cell-phone's little dinky light. Perfect.
Color:
Warm light: Sunrise/sunset. Yellow, orange, and red
tones. Nice. Get up early and stay out late.
Cool Light: Pre-Sunrise, Post-Sunset. Purples, Violets,
and Blues. Think mood ... Cold! Think Incandescent White Balance. Get up earlier, stay out later. Don't pack up after
sunset, wait it out ... Wait for it ... Wait for it ... Yeah, now you get it.
Look for the "mixing of tones" at sunrise and
sunset. Cool/Warm. Beautiful. Magical. In art class, they call them
Complementary Colors. They work well with each other. Like I hinted to earlier …
Get up early and stay out late.
Period.
Direction:
Where is the light coming from, and how does it effect the subject?
Front Lighting.
With the sun behind you, hitting the subject in the front. Old School. Flat lighting. Think Xerox Copies and Driver's
License. No texture. Boring.
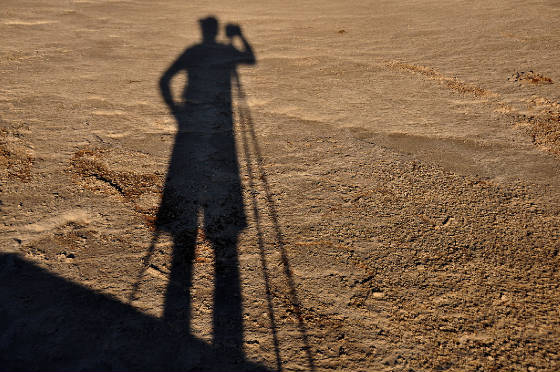
Back Lighting. Very dynamic. Bold. The light coming from behind the subject and straight into the
camera. Think silhouette. You know, beautiful sunset with the black silhouette of giraffe in the foreground. You KNOW what
it is!!Think (-). Push the button ... See what happens.
Side Lighting. Shadows! Brings out texture. A good thing (well, sometimes!).
The shadows give "depth" to the image. 45 degrees is classic. 90 degrees is more creative. Think Cutting Edge ...
Gives you a sharp "edge" between light/dark. Look for side lighting. Look at the shadows. Love it. Use it. Hunt for it.
Again: MY FAVORITE.
Top Lighting:
High Noon. Tough lighting conditions. Shadows under the eyes, nose, cheek bones,
chin. Wearing a hat? Black-Hole under the brim. Need to use "fill-flash" to "open" those shadows up. But ... Good for water
shots - Think Aruba! The light dives down deep into the water ... Also, good for shooting in the forests, and is actually
the best time for exploring Slot Canyons out west! Sweet.
Also ... And very important, it is a great time to eat lunch. Go to a movie. Research
sites for later on, e-mail your mom, or take a nap. Got to love "bad" lighting.
Low/Bottom Lighting:
Evil. Think Halloween. But ...
If used as a gentle "fill light", it can add a nice touch in portraits. Think Broadway floor lights. Be careful, but
try it.
2.) Get Closer
Move in. Zoom in. Fill the frame
with only the things you want in your image. Stop. Check the edges of your frame. Study the subject and zoom in on what
you think is the most important aspect. Keep it simple. Get Closer! Simplify. Get rid of all the crap!
Again ... Keep it simple. Or,
as I like to think of it, remember the K.I.S.S. Principle ..."Keep It Simple, Students".
3.) Take Lots of Pictures
Shoot. Shoot. Shoot.
Work the subject. Shoot. Move around
the subject. Shoot. Look for different angles. Shoot. Try different things. Shoot.
It is the little things that make
a BIG difference. An inch to the right, a foot higher, a tilt of the head, a smile, a smirk. Look for the little details that
make the subject unique, special.
Shoot, shoot, shoot ...
Try something different. And then try something else. Work the subject. And yes, go back to THE LIGHT! Move
around, how does the light change? How does it effect the image?
Work it. Don't just blast away ... Blast away from different angles! Study
the subject. Try different settings ... Which takes us to MY THREE BUTTONS.
MY THREE BUTTONS
ISO Button
The most
important button!!! Your exposures start with what number you choose. The quality of the images starts here as well. Think!
The lower
the number, the better the quality. Aim for 100/200 ISO.
More Light: Lower ISO (100/200)
Less Light:
Higher ISO (400/800)
Low ISO = Slower Shutter Speeds
High ISO = Faster Shutter Speeds
Want Blur? Low ISO (100/200)
Want to freeze
the action? Higher ISO (400/800)
Tripod/Flash: Low ISO
No Tripod/Flash: High ISO
Use the slowest ISO setting you can get away with
while also getting the shutter speed you need. A game you will play forever. Have fun! These newer cameras have great ISO
quality at higher numbers … Find out where your camera begins to lose quality ... 800? 1600? 6400? Higher?
PLAY! Find out
what your camera can do for you. That simple. Play!
White Balance Button
Changes the COLOR of an image. Auto is good. But
... You can make your images "cooler" or "warmer" if you want. Play.
You're the artist. Use your "tools".
Also ... Sometimes the "wrong" color balance just might turn out to be the "correct" color balance!
Who knows? Try it. Again, PLAY! You just delete the weird ones, no harm done. Nobody has to know, it will be our little secret!
Compensation
(+/-) Button
The one I use the most.
Let me repeat that ...
The
one I use the most.
Wear it out! Makes your images
lighter (+) or darker (-). Shoot. Adjust. Shoot again. Repeat. Take several images at different settings ... Who knows? You
just might like the "wrong" one.
If the subject is BLACK/DARK (-)
If
the subject is WHITE/LIGHT (+)
Your camera wants everything to be "mid-tone" (18% Gray), life is not so perfect. Use this button!!!
A lot. You are the artist, be creative. Don't settle for what the "Geek Squad" back in Japan thinks is the right exposure.
Take charge of your art!
Play, play, play. And play some more.
Find an all-black colored subject. Take a picture of it. Fill your frame with
just the BLACK, period. Look at the results. Make the adjustment … Yes, I know you will need to, I'm that good (and
that old!). If you had your Compensation Button at 0.0, your black subject WILL be GRAY. Period. Make it BLACK (-).
And, just to
make sure you understand this whole mess, find an all-white subject. Make it WHITE (+).
Again … PLAY! PLAY! PLAY!
Read my Cliff
Notes again. And again. And just for the fun of it, read them again!
Study this.
Practice these ideas. Get your camera out. Find these buttons. Get out and shoot.
Think about MY THREE RULES every time you bring the camera to your eye.
Use MY THREE BUTTONS. See how your
camera is effected by these buttons. Take charge of YOUR vision, your "style". That simple.
Get out and shoot. Find your passion -- Then go out and shoot it.
Over and over again.
You MUST use these guidelines to get started.
You
MUST study this in order to pass the test.
Yes, it really is that simple.
Have fun! Shoot, shoot, shoot!
You must!